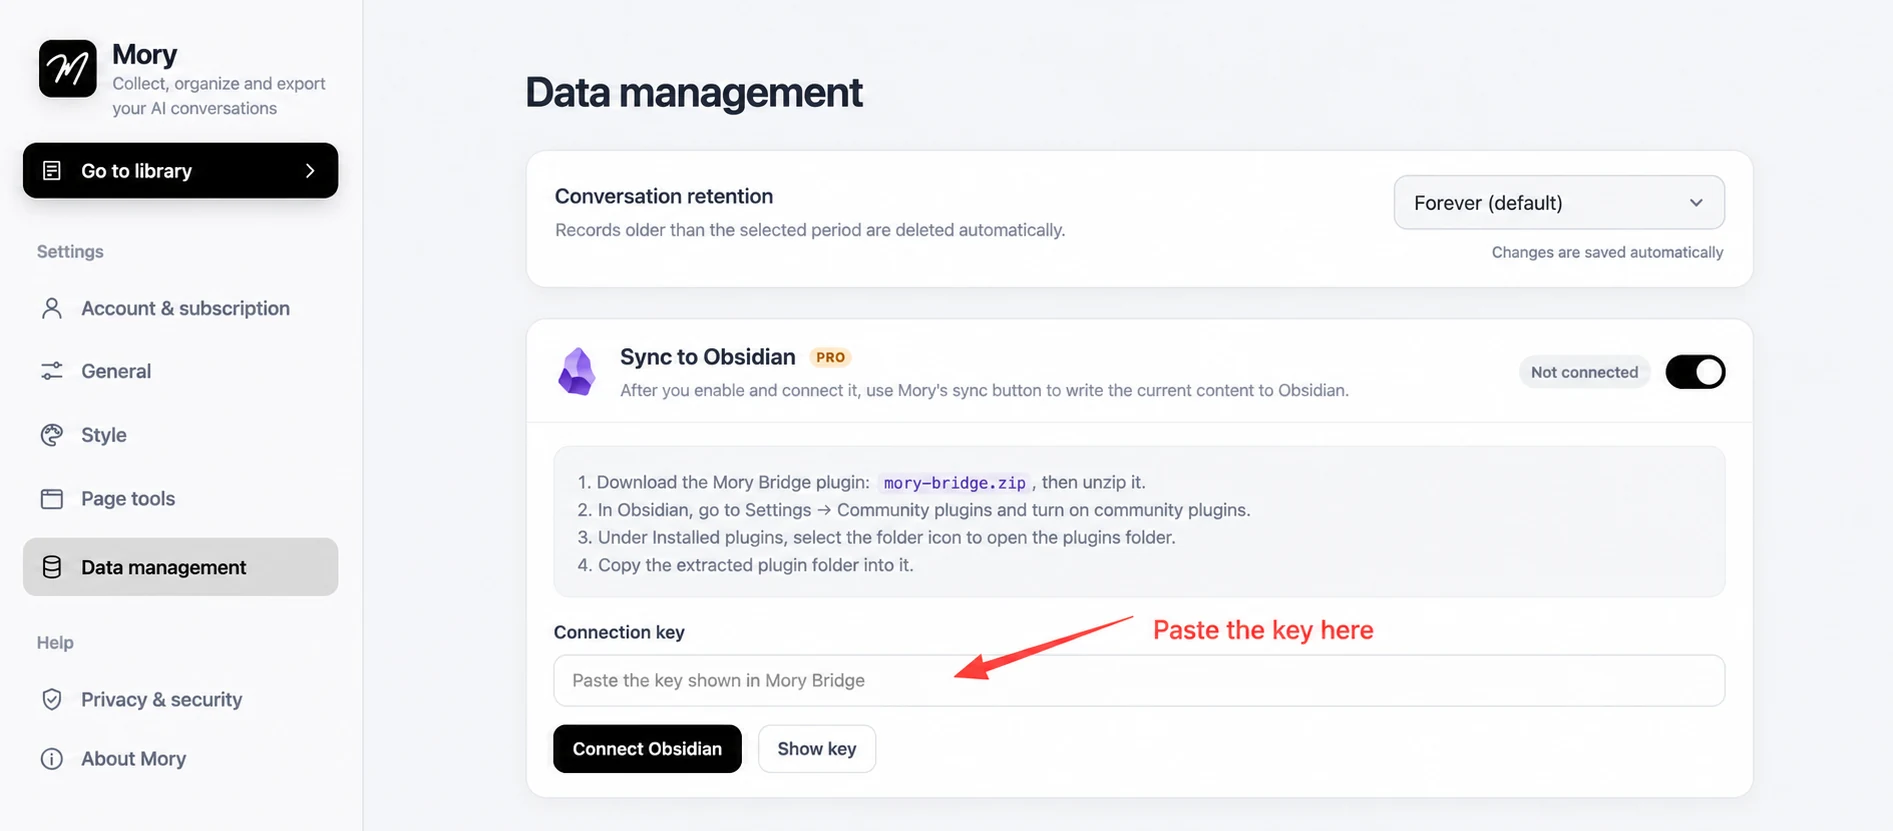
Sync to Obsidian
On this page
Connect Mory to Obsidian
After you install Mory Bridge and connect it locally, conversations saved in Mory can be synced to your current Obsidian vault.
1. Download and unzip Mory Bridge
Use the button below to download the plugin package. When the download finishes, unzip mory-bridge.zip to create the mory-bridge folder.
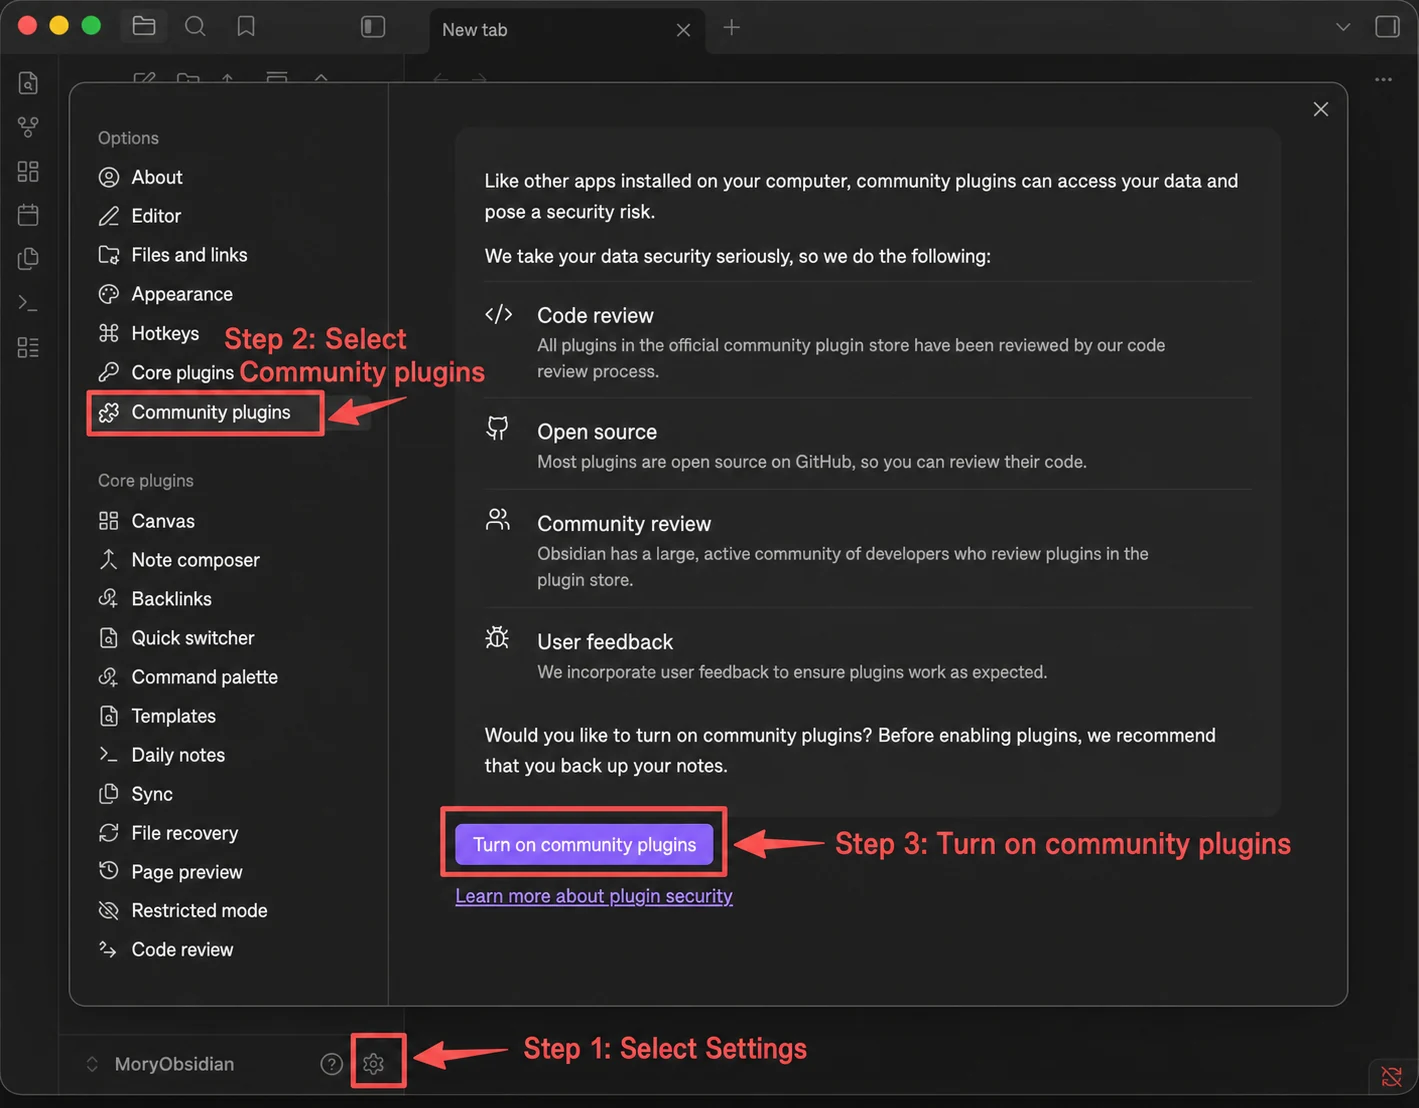
2. Open Obsidian settings
Open Obsidian and select the gear icon in the bottom-left corner.
3. Open Community plugins
Select Community plugins in the settings sidebar.
4. Turn off Restricted mode
If Obsidian shows the Restricted mode notice, select Turn on community plugins to allow third-party plugins.
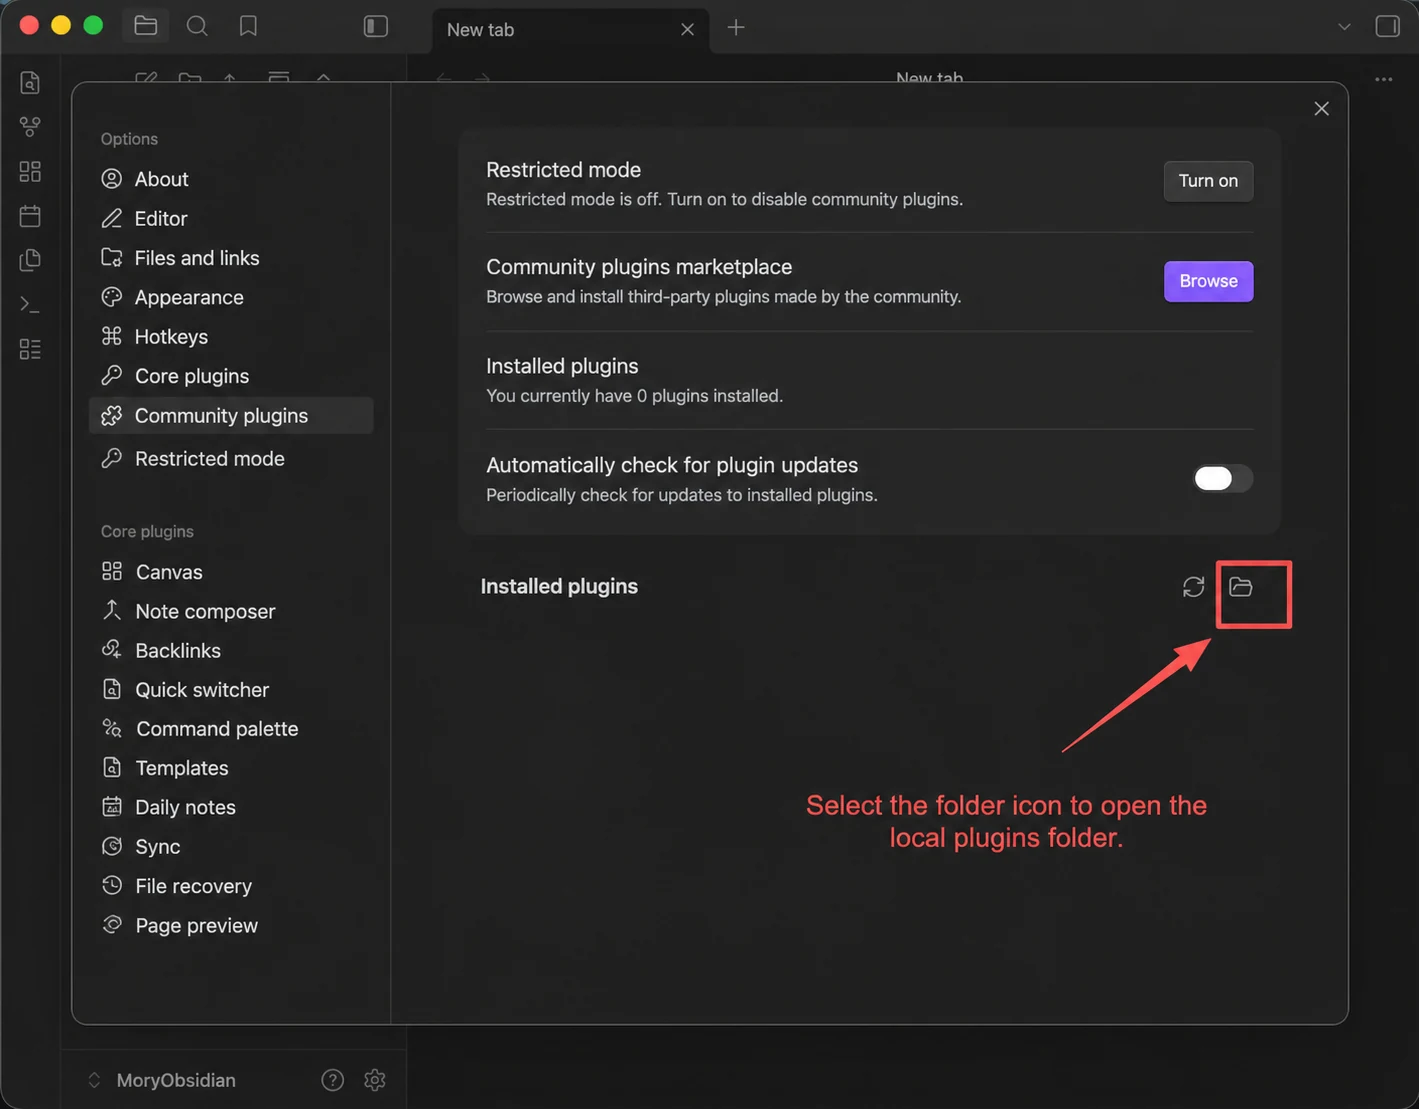
5. Open the plugins folder
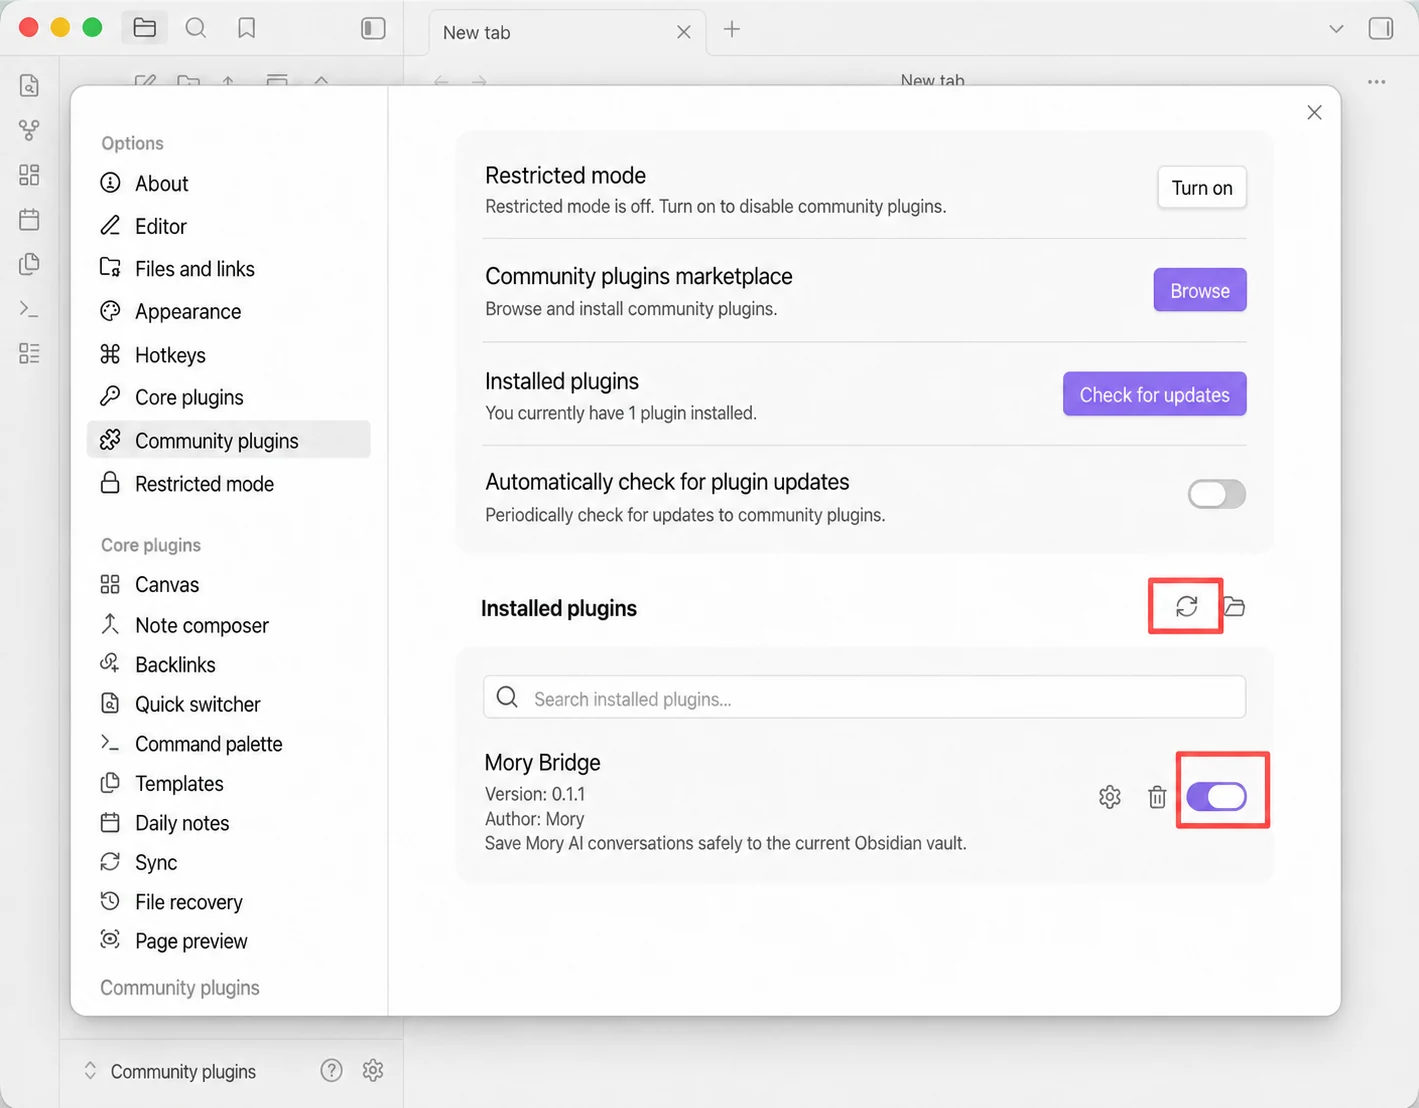
After Restricted mode is off, select the folder icon beside Installed plugins to open the plugins folder for the current vault.
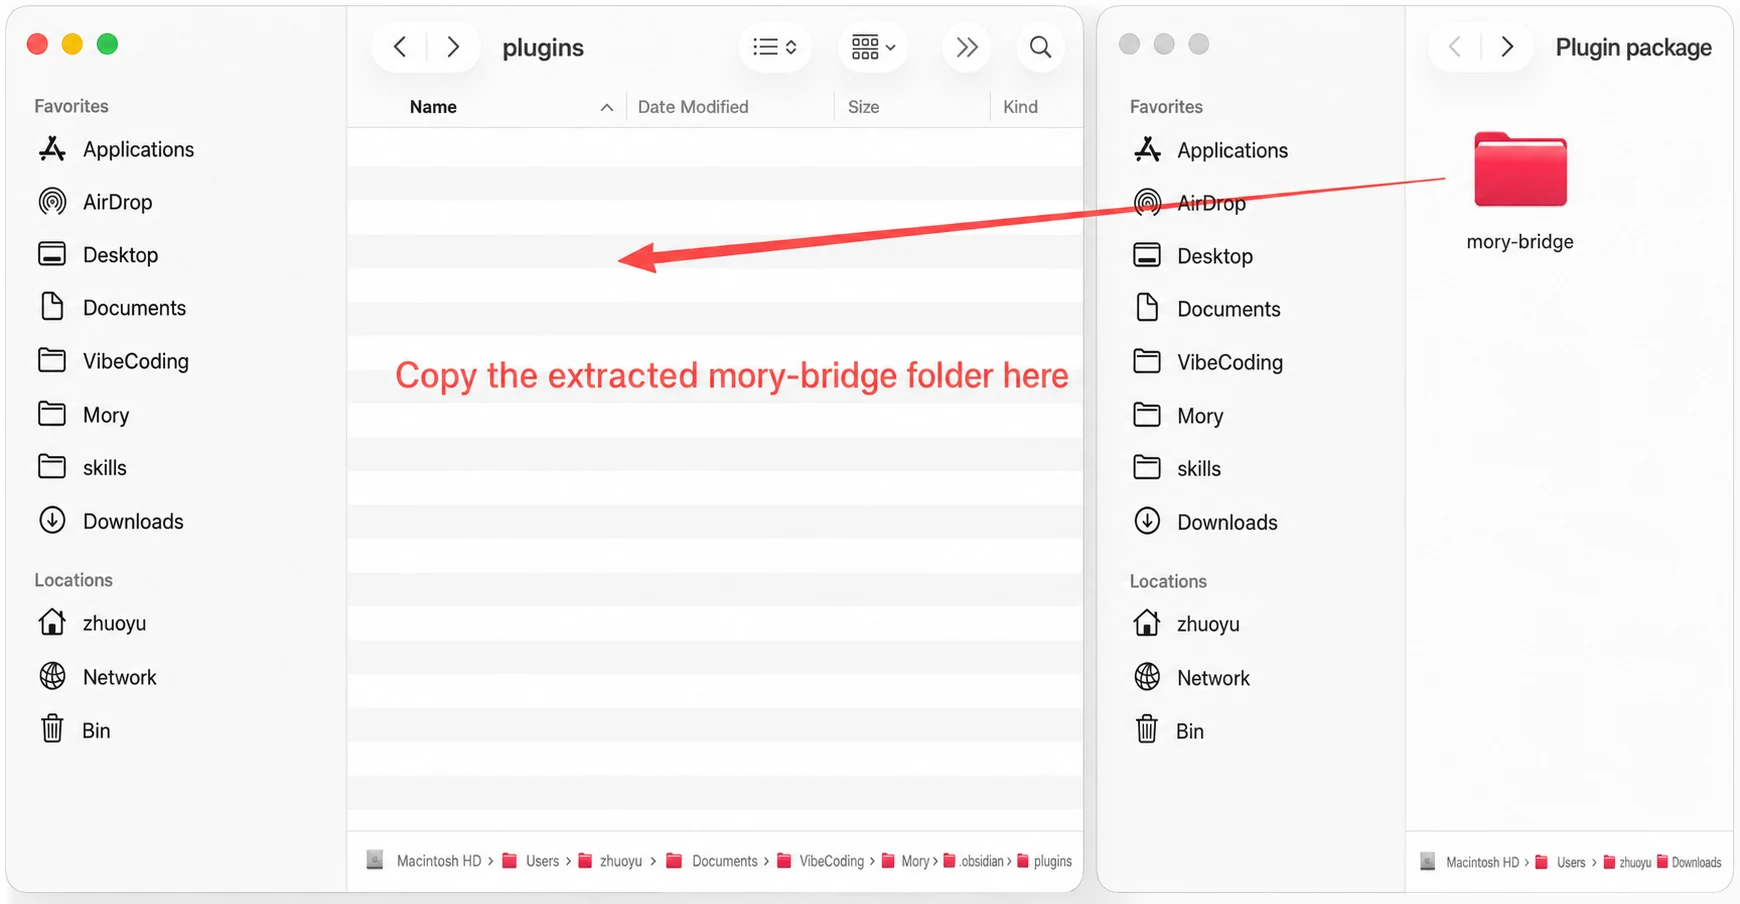
6. Copy the Mory Bridge folder
Copy the complete mory-bridge folder from step 1 into the plugins folder you just opened.
7. Refresh and enable the plugin
Return to Community plugins in Obsidian and select the refresh icon. When Mory Bridge appears, turn on its switch.
8. Copy the connection key
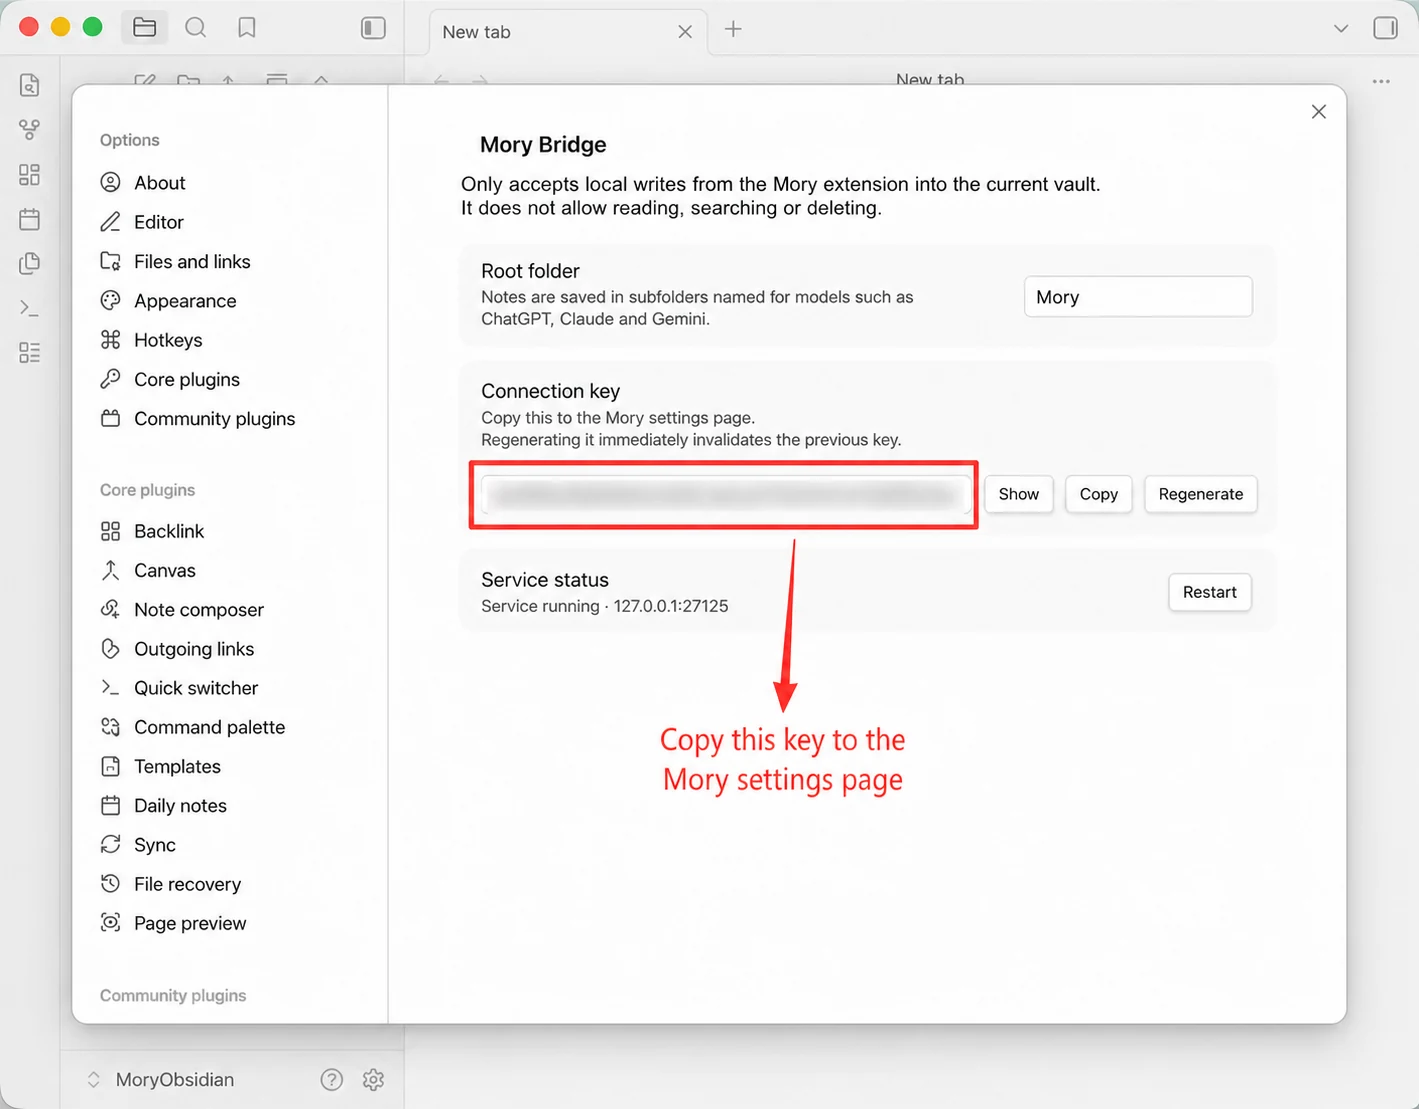
Select the settings icon beside Mory Bridge, confirm the service is running, then select Copy to get the connection key.
9. Connect Obsidian in Mory
Return to Settings → Data management in the Mory extension, turn on Sync to Obsidian, paste the connection key and select Connect Obsidian.